
Deets for deets
– If you use your car a lot (and are often transporting food, kids, and pets) your car can get pretty dirty. If you like your vehicle nice and tidy you shouldn’t have to pay a lot of money for it. The only solution: DIY with these best reviewed car-detailing products on Amazon.
Rinse before washing
– If you hit your dry paint with soapy water, you’ll just grind the surface dust and road grit into your paint finish. Professional detailers always start with a clear water rinse to remove as much dust and dirt as possible. Check out these weird tips that’ll help you better clean your car.
Use the right soap
– Dishwashing liquid is the go-to choice for most DIYers. But it shouldn’t be. Dishwashing detergent is simply too harsh. It sucks important oils out of your car’s finish and can actually shorten the life of your paint. Any industry car washer would tell you that!
Forget the sponge, use a microfiber mitt
– Sponges capture and hold dirt and grit in their large pores. You can wring it out, but the grit will stay put. Once grit is embedded, you may as well wash your car with sandpaper. Detailers use a microfiber car wash mitt because the grit falls out when you rinse. If you haven’t been cleaning with microfiber cloths, you should be.
Use two buckets
– One for clean soapy water and one for rinse water. After each wipe, dunk your dirty wash mitt in the rinse water bucket and swirl it around to dislodge the dirt and grit. Then dunk it in the soapy water and pick up where you left off. Dump the dirty rinse water and refill with clean water before you move to the other side of the car. That’ll keep the soapy water clean. By the way, here’s why you should never go to another car wash.
Forget the chamois, dry with a microfiber towel
– Chamois soak up water, but they don’t pick up any grit that’s left after rinsing. Instead, they just grind those particles into your paint. A microfiber towel, on the other hand, collects the particles. Rinse the towel in clean water to remove the grit. Then wring and keep drying. Microfiber cloths are not only an awesome cleaning product, but they’re also reusable (just don’t toss them in the dryer).
Remove minor scratches before polishing
– This step is what separates the DIYers from the professional detailers. Polishing increases the shine, but it doesn’t remove scratches. However, if you remove the scratches first with a scratch removal kit and then polish, you’ll get even more shine At-home scratch repairs are one of the easiest ways to save cash on car care.
Buy a dual-action polisher
– Detailers wouldn’t be caught dead without a dual-action polisher. Don’t confuse this incredible tool with a high-speed buffer! Buffers run at much higher speeds and can burn the paint right off your car if you stay in one place too long or press too hard. Polishers are different. They run at lower speeds and oscillate as they rotate. Any DIYer can get the hang of polishing in just a few minutes. Polishing before waxing makes a huge difference, so your investment really pays off.
– One more polishing tip from professional detailers—apply the polish to the machine’s pad. Then wipe the pad across your paint. That’ll prevent all the polish from flinging off the pad as soon as you hit the trigger.
Use synthetic wax
– Old style paste waxes look great on antique cars. But they don’t produce the same “wet look” as modern synthetic wax, and they don’t last as long. When car dealers sell paint sealant, they’re really just applying a high-quality synthetic wax, which is something you can do yourself for a fraction of the price. Apply synthetic wax in small sections using a wax applicator sponge. This is much gentler than a car wash that may hurt your vehicle’s finish.
Remove wax haze with a microfiber towel
– You guessed it, microfiber towels are the heroes of car detailers everywhere. Wipe off the wax haze using circular motions. As the towel loads with wax, refold it to a cleaner section. Use a second towel when the first one is fully loaded. Cars are almost always dirtier than you think, and after this step, it shows.
Start at the top
– DIYers usually start by vacuuming the carpet. That just pushes dirt from the dash, seats and door panels back onto your freshly cleaned carpet. Professional detailers start at the top and work their way down to the carpet.
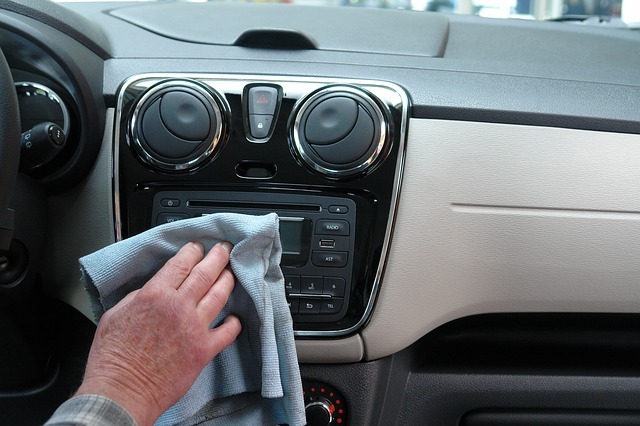
Suck it up as you go
– Use a small detailer’s brush and shop vacuum to remove dust and dirt from all the nooks and crannies on your dash and console. Hold the shop vacuum wand near your brush to suck up all the crud as you work your way down to the floor. Learn how often you should really be cleaning the inside of your car.
Brush and vacuum your carpet
– Automotive carpet doesn’t like to let go of dirt. If you just vacuum it, you’ll leave plenty behind. To remove more dirt, detailers use a stiff brush and scrub the carpet as they vacuum. You’ll see the dirt particles bounce to the surface so you can suck them up with your shop vacuum.
Use a non-silicone matte finish dash and vinyl protectant
– Silicone dashboard protectant sprays leave a slick film on your dash that actually attracts more dust, so you’ll have to clean it more often. Plus, a shiny dash reflects into your windshield. That reflection and glare can reduce your vision, especially at night. That’s why professional detailers use non-silicone matte finish protectants. They still look great and they reduce glare.
Lubricate door seals
– You probably wiped off any door seal lubricants when you cleaned the door. Detailers make it a point to re-treat the seals with silicone spray. Spray some on a rag and wipe it around the entire door seal. The silicone prevents the seal from sticking in summer and in winter.
Finish with the glass
– If you cleaned the inside of your windows before you cleaned the dash and applied vinyl protectant, you’ll just have to clean them again. That’s why detailers save glass cleaning until the very end. Cleaning the windows at this point removes all cleaning and vinyl treatment overspray and leaves you with sparkling clean windows. Next, check out these maintenance tips that will extend the life of your car.
Source: MSN | By: The Editors of The Family Handyman| September 18, 2020 |https://www.msn.com/en-us/lifestyle/beauty/15-cleaning-secrets-only-car-detailers-know/ss-BB19btiE?li=BBnbcA0#image=1
To learn more, contact us today!
Roberto Baires
Phone:888.531.3582
Contact us!

